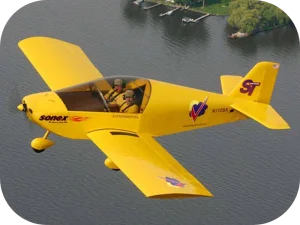
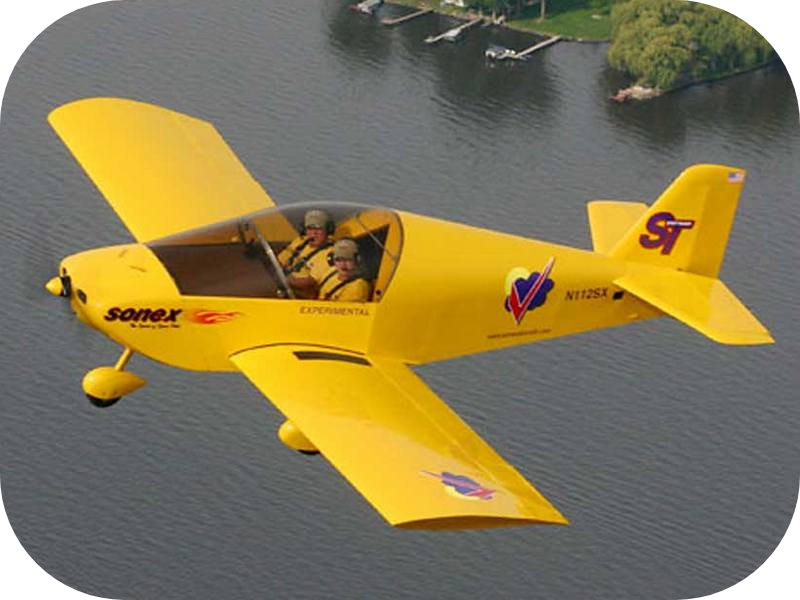
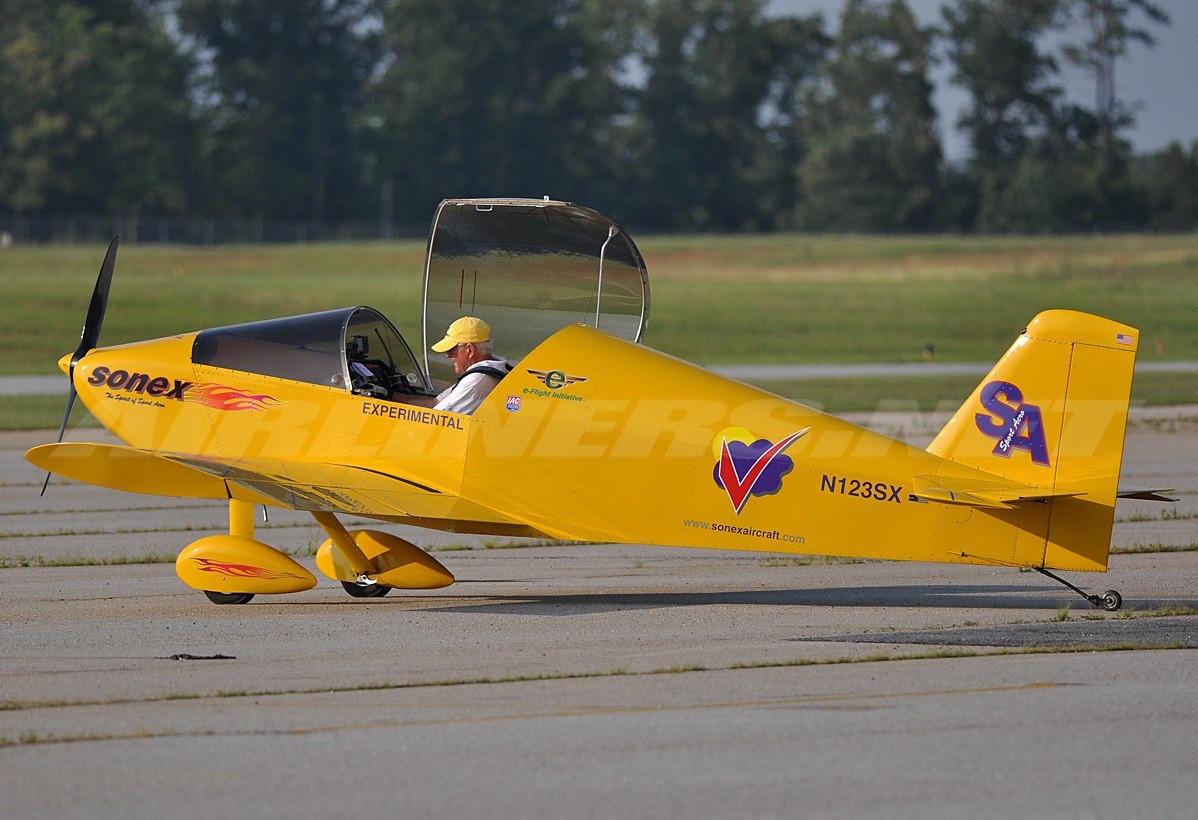

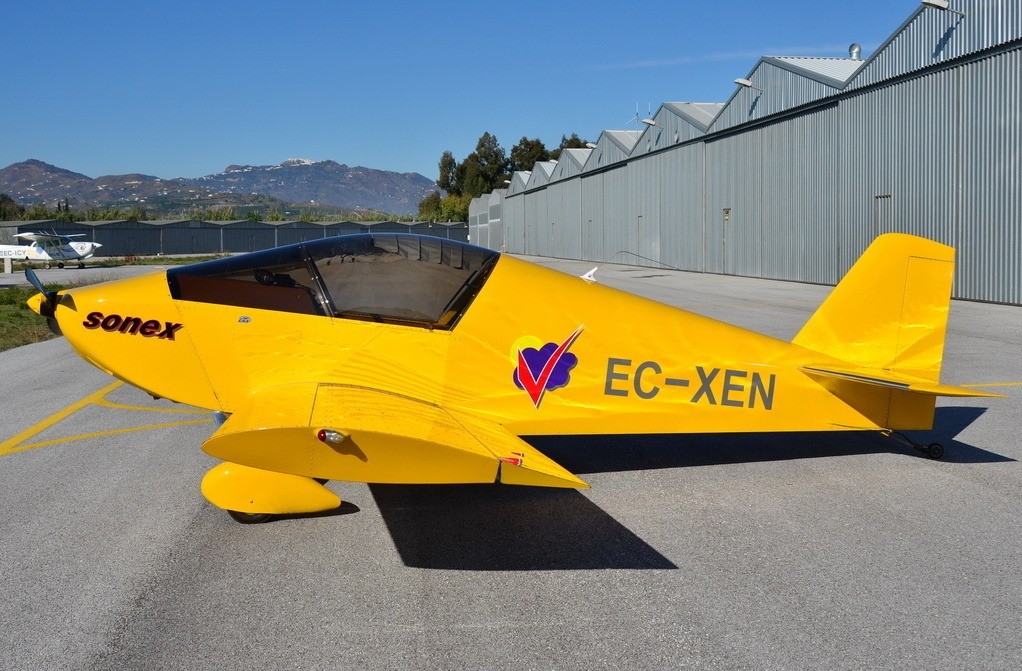
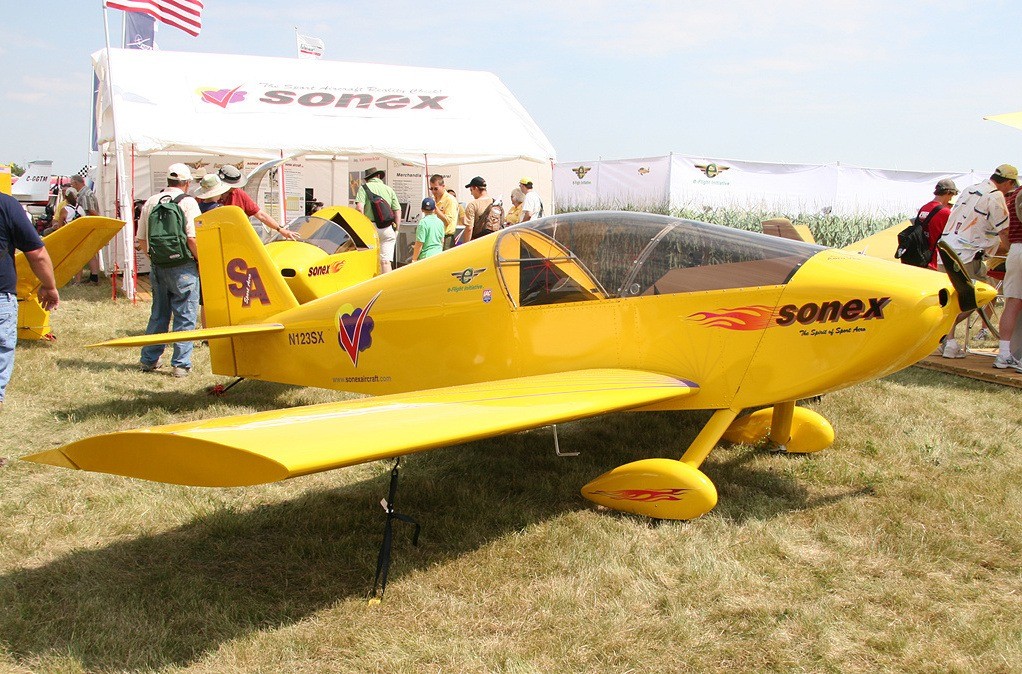
The Sonex
is an all-metal two-place monoplane designed to meet the needs of the European and Domestic sport aircraft markets. The Sonex can be fitted with various lightweight engines between 80 to 120 hp.
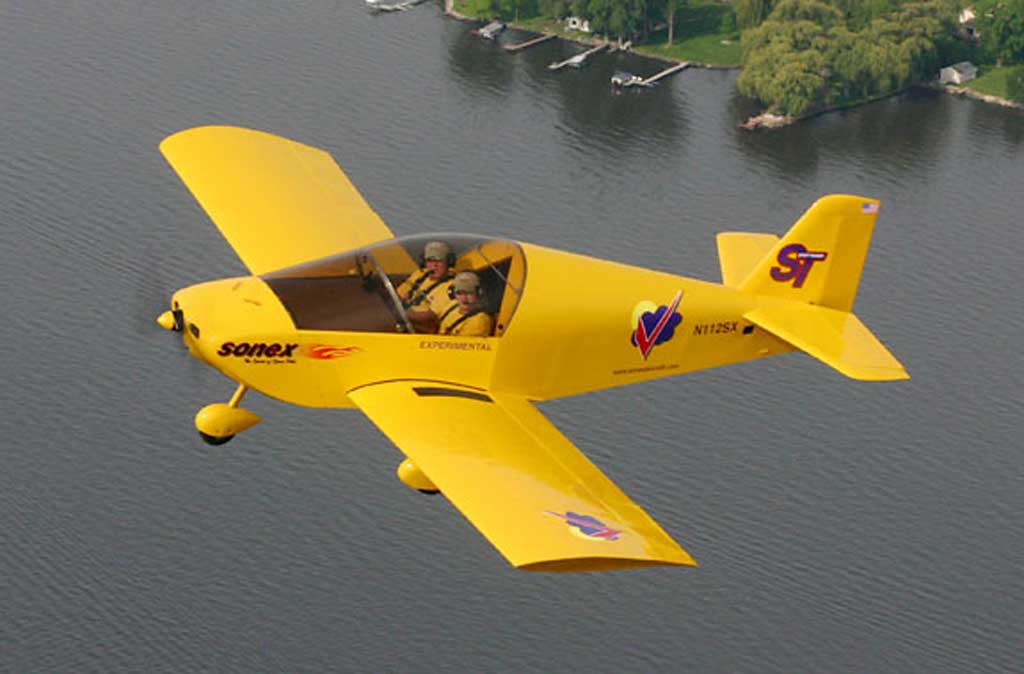
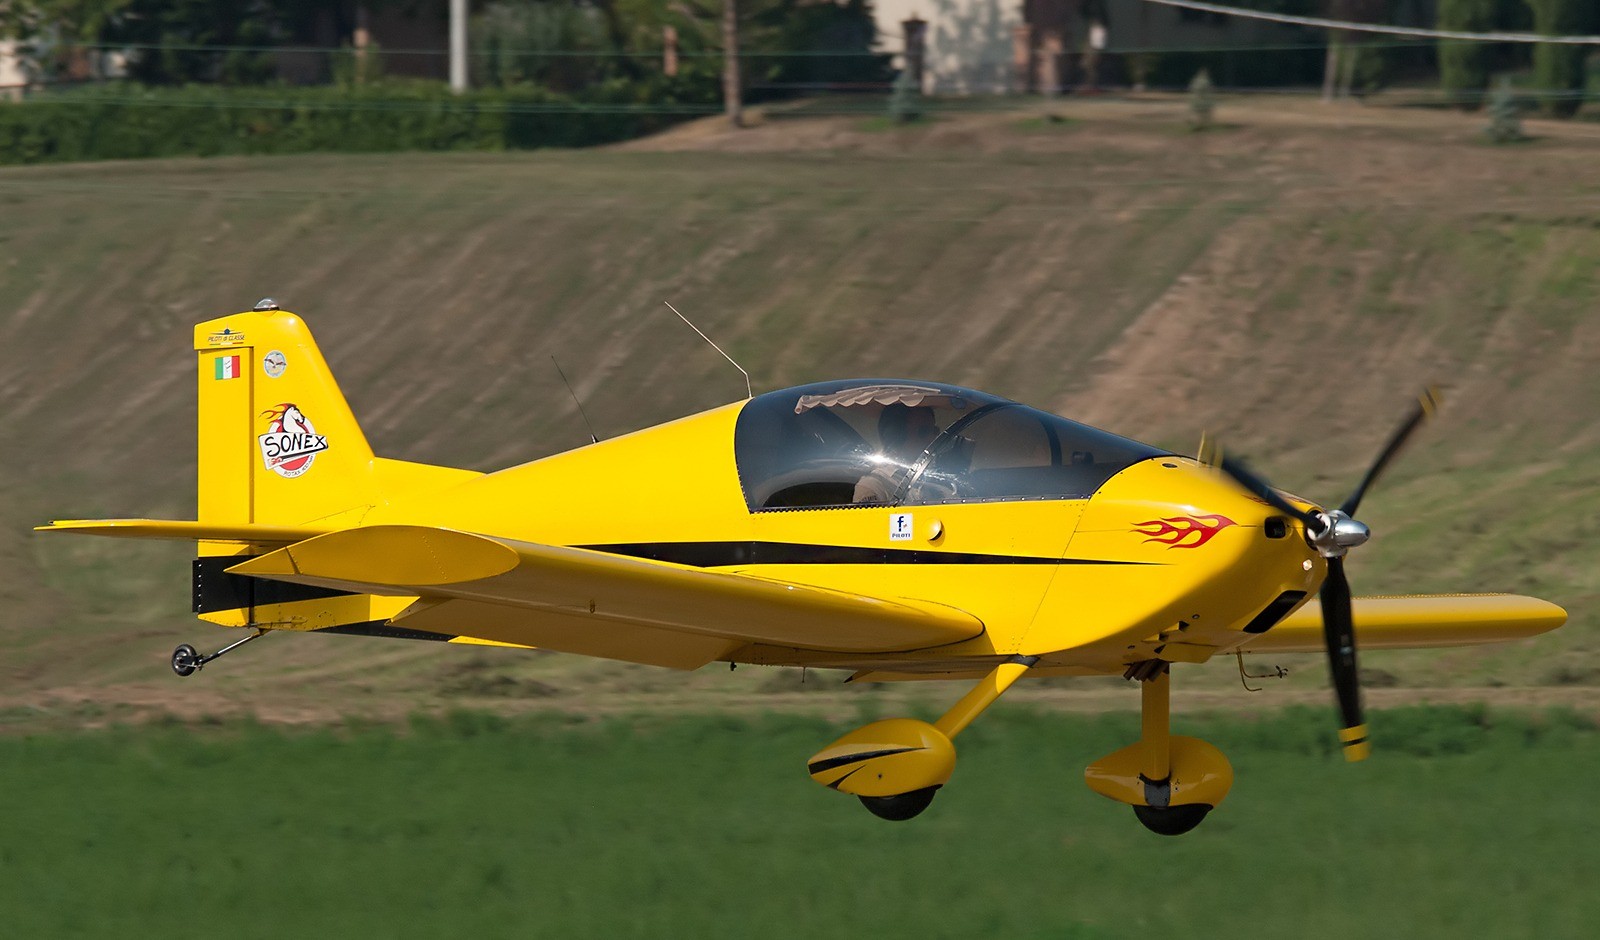
The Sonex has a very clean and aerodynamic design that gives it excellent performance. Cruising at a 130 mph at sea level is quite good!
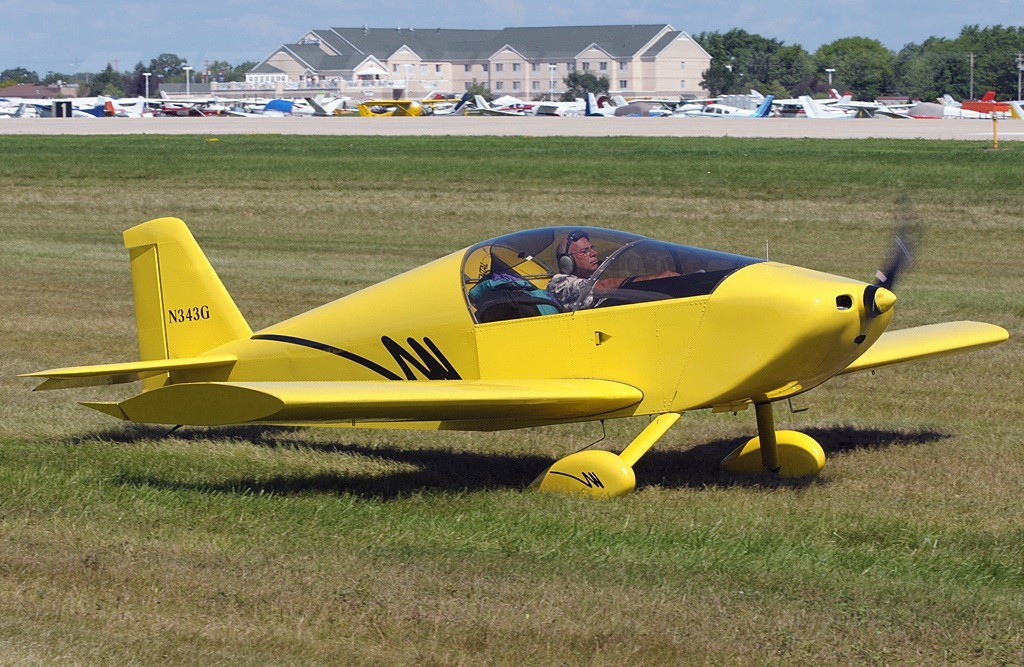
Options are tailwheel, tricycle, center, or dual sticks.
The Sonex can be flown in the US as a LSA (light sport aircraft).
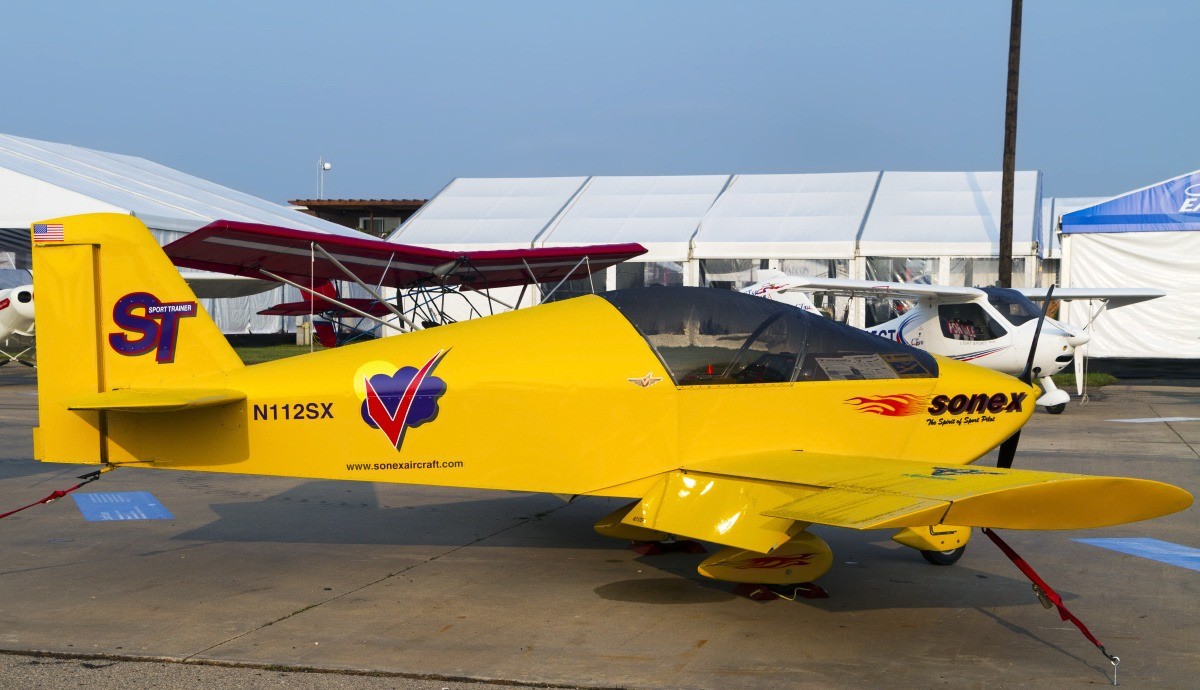
The Sonex plans contain several construction options, including conventional or tricycle landing gear, as well as a center or dual stick. Motor mount drawings are supplied for all three recommended powerplants: the 2180cc Volkswagen, 2200 Jabiru, and 3300 Jabiru. High performance is achieved through a clean aerodynamic shape and simple, light weight construction.
The Sonex can be built from scratch using factory-supplied drawings or may be assembled in approximately 800 to 1,000 hours using the precut complete airframe kit.
The aviation website Aero-News.Net named the Sonex the Plane Of The Year – E-LSA Kit Category for 2006.
specification Sonex
- Crew: one
- Capacity: one passenger
- Length: 18 ft 1 in (5.51 m)
- Wingspan: 22 ft 0 in (6.71 m)
- Height: 4 ft 8 in (1.42 m) with conventional landing gear, 74″ with tri-gear
- Wing area: 98 sq ft (9.1 m2)
- Airfoil: NACA 64-415
- Empty weight: 620 lb (281 kg)
- Gross weight: 1,150 lb (522 kg)
- Fuel capacity: 16 US gallons (60.6 litres)
- Powerplant: 1 × Jabiru 3300 six cylinder horizontally-opposed aircraft engine, 120 hp (89 kW)
- Cruise speed: 170 mph (270 km/h, 150 kn) at 8000 ft
- Stall speed: 40 mph (64 km/h, 35 kn) flaps down
- Never exceed speed: 197 mph (317 km/h, 171 kn)
- Range: 400 mi (640 km, 350 nmi)
- Service ceiling: 23,000 ft (7,000 m)
- g limits: +6/-3 at aerobatic gross weight or +4.4/-2.2 at utility gross weight
- Maximum glide ratio: 11:1
- Rate of climb: 1,400 ft/min (7.1 m/s)
- Lift-to-drag: 11:1
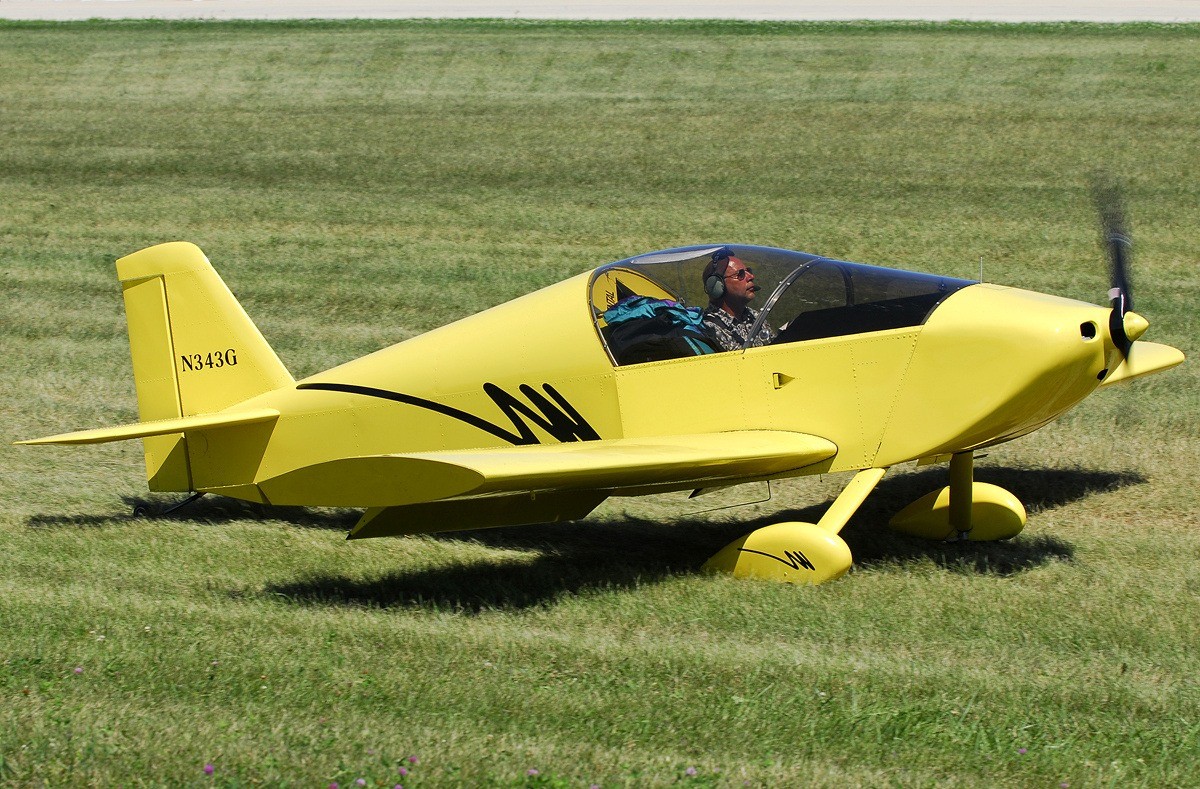
Building A Sonex: What It’s Really Like
by Robbie Culver
As a young man growing up in Wisconsin, I was exposed to what was, at the time, the annual EAA convention in Oshkosh. Long before it became AirVenture, it was an aviation event of epic proportions that etched itself in my soul and led to the lifelong dream of building an airplane and flying it to Oshkosh for the show. On October 10, 2015, phase one of this dream came to fruition after 4 1/2 years of hard work and financial commitment to build a Sonex experimental aircraft.
When life permitted me to actually consider such a project, I began to research the choices. My wife would tell you I obsessed over the choices and she may well be right. If I was going to take this project on, I wanted to be certain I could finish it. But what to build?
My mission was simple – an airplane I could build and fly, which would seat two side by side and allow me to get my aviation fix, yet still be cross-country capable. I wanted an easy-to-build kit with a good completion rate, aluminum construction, and an affordable kit price. There were many choices, but narrowing it down was relatively easy.
I attended an EAA Sport Air workshop to ensure I could actually perform the required skills, and left with the knowledge and confidence that I could do this. That workshop was well worth the investment of time and energy, and in the back of the workshop in the EAA museum was a Sonex under construction by the EAA staff.
I knew I wanted a simple kit that I could fly for under $40,000. I also knew that in spite of my lack of experience in conventional gear aircraft, I wanted to build a taildragger. My initial conversations were with Joe Norris of EAA, who was a valuable resource of information and insight. Ironically, Joe would figure prominently later as I prepared for my first flight. If I were to tell someone considering taking on such a project, it would be to choose the airplane that fits your intended mission. Mine was flying for fun, including local fly-ins, breakfast flights, and the occasional cross country flight.
Several years of searching at Oshkosh, in magazines and online, analyzing kits and completion rates, real world costs versus marketing hype, I kept going back to John Monnett’s Sonex kit. It looked like it fit my mission, it was popular and had several hundred completions, and was very affordable. Sonex also offered several models of aircraft, and the Sonex could be built from plans, as sub kits, or as a complete kit. Several engine options were available.
The option to build from plans was important to me. If the company went out of business during the project, it was possible to complete it from raw materials. The plans for the Sonex are also so detailed that I felt they were enough for me to successfully complete the build if no factory assistance was available. The kit uses pulled rivets and to me that was also a bonus – it was easier to work on without constant assistance that is required when bucking solid rivets.
Finally, the company had great technical support and a solid reputation with the homebuilt community. It didn’t hurt that a Monnett-designed Sonerai II was in the family garage as I grew up. I was familiar with his aircraft design.
In 2011, I finally reached a point where it became financially viable and I had time in my life to do this. With the support of my wife and son, I signed up for the builders workshop held at the factory in Oshkosh. The workshop was to introduce my wife and me to the company, the kit, and to allow us to get a feel for the construction methods required to build the project. (My wife is one-of-a-kind. We met and were married at an airport and are partners in everything we do)
Much like the EAA Sport Air workshop, the factory builders workshop was another boost in the “I can do this” mentality I would go back to time and time again in the next four years. We left with a small project completed, a set of plans purchased the final day of the workshop, and a tail sub kit on order.
And so it began. I set up a workshop in my basement to build the tail sub kit and, by fall of 2011, I had a completed horizontal stabilizer and vertical stabilizer, plus control surfaces. The sub kit was very complete: I purchased tools and two sizes of clecos. I made small pieces, which assembled into larger pieces, which became an airplane tail. Pilot holes were drilled, pieces were cleco’d together, and then final holes were drilled. The parts were disassembled, all holes were deburred, rough edges were smoothed, and the parts were reassembled and riveted together. Repetitive, but not difficult. In fact, it was fun!
Pulled rivets require only one person for final assembly, so even though my wife was an invaluable building partner, I was able to work alone for much of the project. The experience made me confident we could build the remainder of the kit, so we ordered wings and moved the project to the garage.
The wings were more complex than the tail, and I spent a good five months over-analyzing this part of the project as it sat on a large flat table in the family garage. I was so concerned about building wings with a twist or warp that I couldn’t get started beyond the initial assembly of the structure. For me, this was one of the low moments of the project.
But I got past it. I began to work on it actively again and while it took me some time to get back into the project actively, I did. Homebuilders will tell you to work on the project every chance you get – every day if possible – my experience would reaffirm that.
I ended up putting the wing frame on sawhorses and using a laser level and shims to make sure it was straight. With some help I was able to get one wing completed and riveted together. As we completed it, I stood back in amazement and for the first time realized that, while it was a long path to completion, I would eventually complete and fly the airplane.
The second wing went much faster and we were then ready for the fuselage kit. One reason we had ordered sub kits was lack of storage space. When the fuselage kit arrived with one wing still under construction, our two car garage quickly became filled with airplane. A vertical storage rack allowed us to store one wing, and eventually both, off to one side of the garage.
The kit proved to be exactly as advertised: many holes were pilot drilled from the factory as part of the advanced CNC processes used in today’s kits. Matched hole construction meant many components fit together right out of the box. The parts were well executed, and the plans were easy to understand, extremely comprehensive, and are so well done that a build manual was not required. Anyone with a basic understanding of blueprints can read and understand the plans.
Next was the fuselage, built in two pieces and then brought together. By the time the fuselage was complete, our garage was simply out of room. It was time to get it on the landing gear and remove the work tables.
With that major step complete, we purchased an AeroVee engine kit from Sonex. There are several engine options to power the airplane, but the AeroVee kit was the most affordable. Having not built an engine since high school some years before, I had my concerns. But my wife, who is definitely more mechanically inclined than I am, assembled much of the case and components. The result was a well-built, VW-based engine with dual ignition and a lot of aftermarket parts. It appears only the case and possibly the crank was actually a VW stock part. The engine kit is complete, well-executed, and thoroughly documented.
Once complete, we hung the engine on the airframe in December 2014. Wow. What a moment! My airplane had an engine! It was a pivotal moment in the project. Next up was finishing it, which included several very challenging components: the canopy and the cowling.
If I had been required to do these two parts first, I would never have completed the airplane. The canopy was challenging enough, but the cowling… Wow! Working with fiberglass made me realize that anyone who builds an entire airplane from it deserves accolades far beyond what they receive. Simply put, it is nasty work.
But we got through it and, in spite of making a serious mess and a small mistake that resulted in replacing the windshield, it was done. By late August 2015, it was apparent it was time to consider moving the airplane to an airport and for me to prepare for its first flight. I am certain many pilots have the skills to hop in a new airplane and safely fly it. I knew I had not flown much during the build process, had very little tailwheel time, and no Sonex experience.
As a result, I went and got transition training… twice. One of those was from Joe Norris, now the flight instructor at Sonex Aircraft, and in charge of their T-Flight transition training program. The result was that on October 10, 2015, my first flight was uneventful and a delight. The airplane performed flawlessly, and that flight was the reward for literally years of dreaming about it and all the sweat equity I had invested in the project.
If you are thinking about building an airplane, I would say go for it! Do your homework, define your mission, and get the commitment of family and friends you will most certainly need to see it through. If I can build an airplane, so can you!
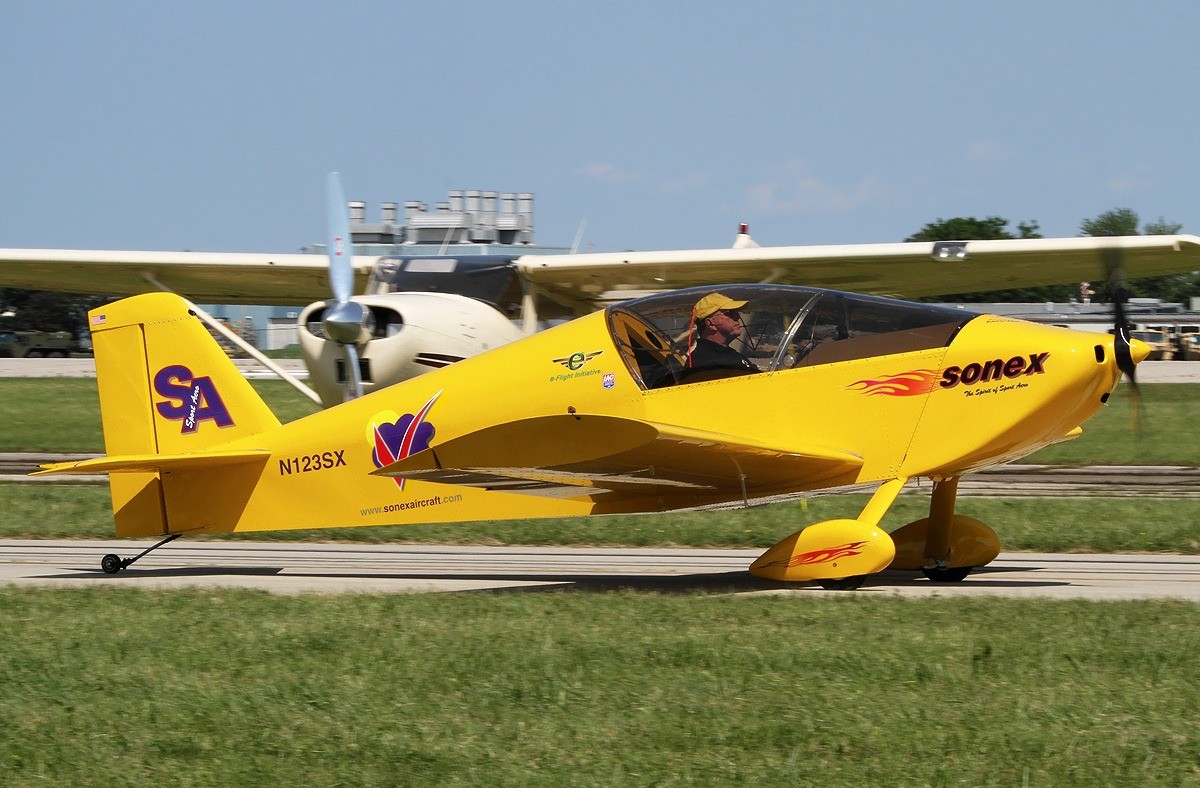
Flight test: Sonex Aircraft LLC Sonex
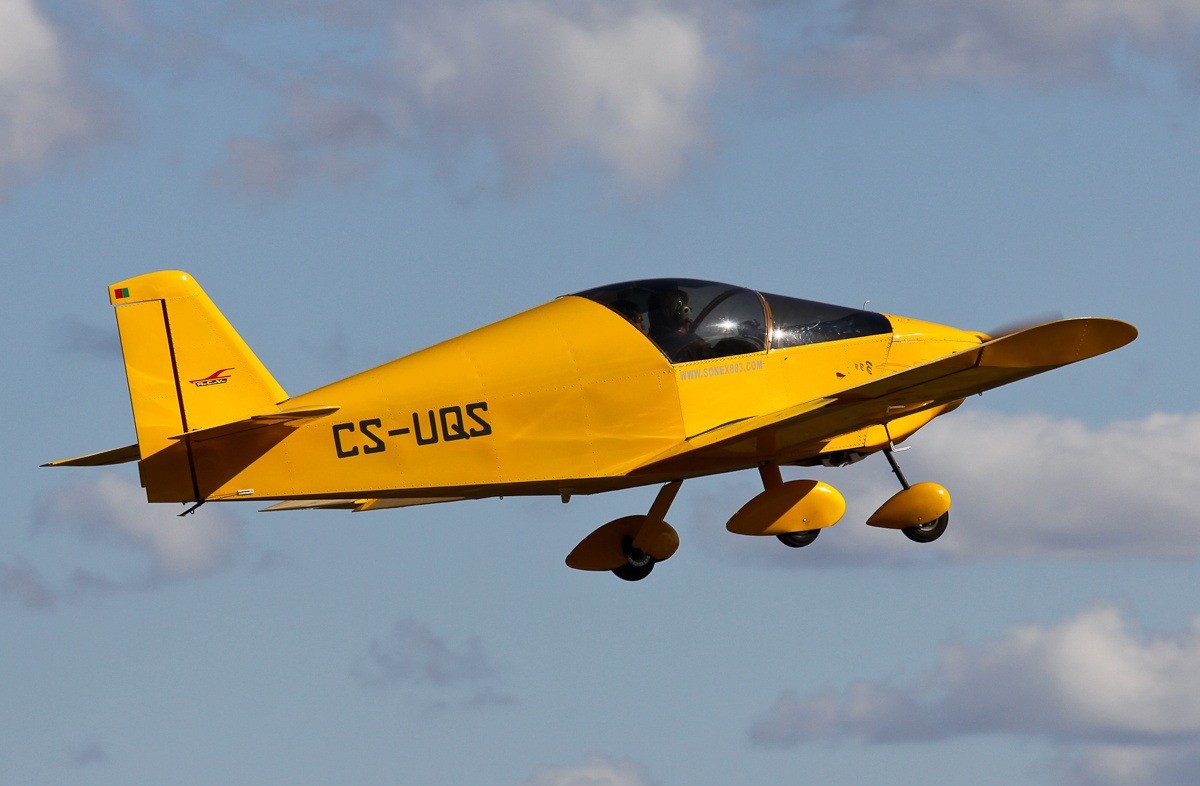
Ripping through an English autumn sky at 125 knots while burning just 22 litres of fuel per hour, or reefing around in a very tight turn the same question keeps bugging us – why aren’t there more of these in the UK? | Words: Dave Unwin
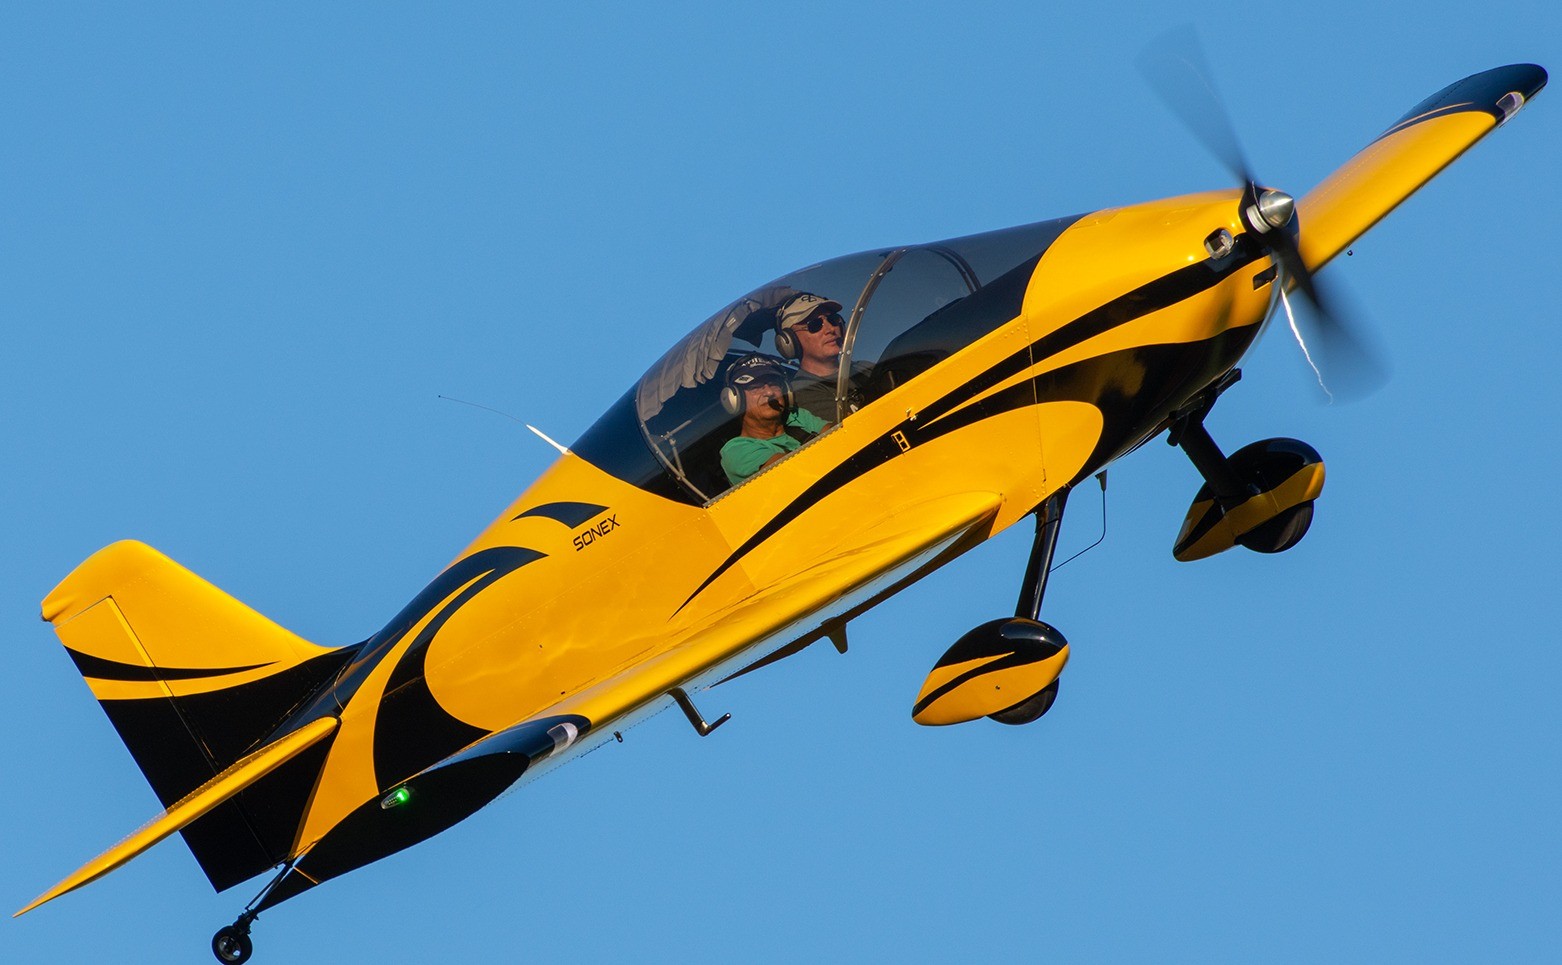
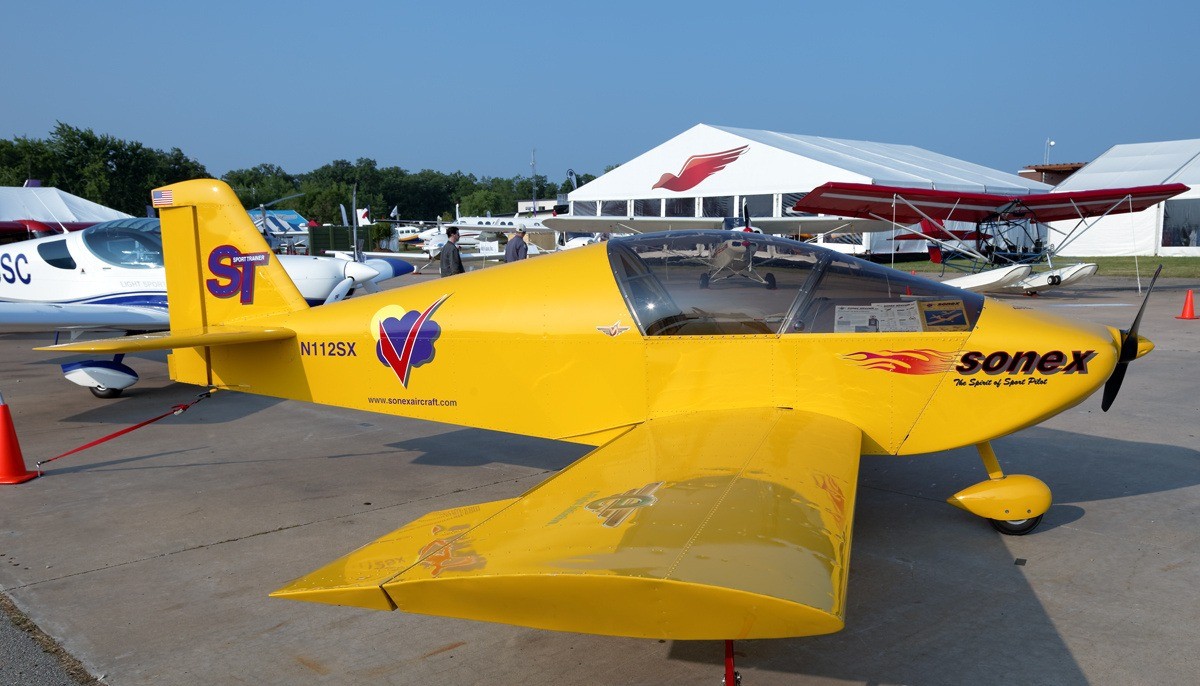
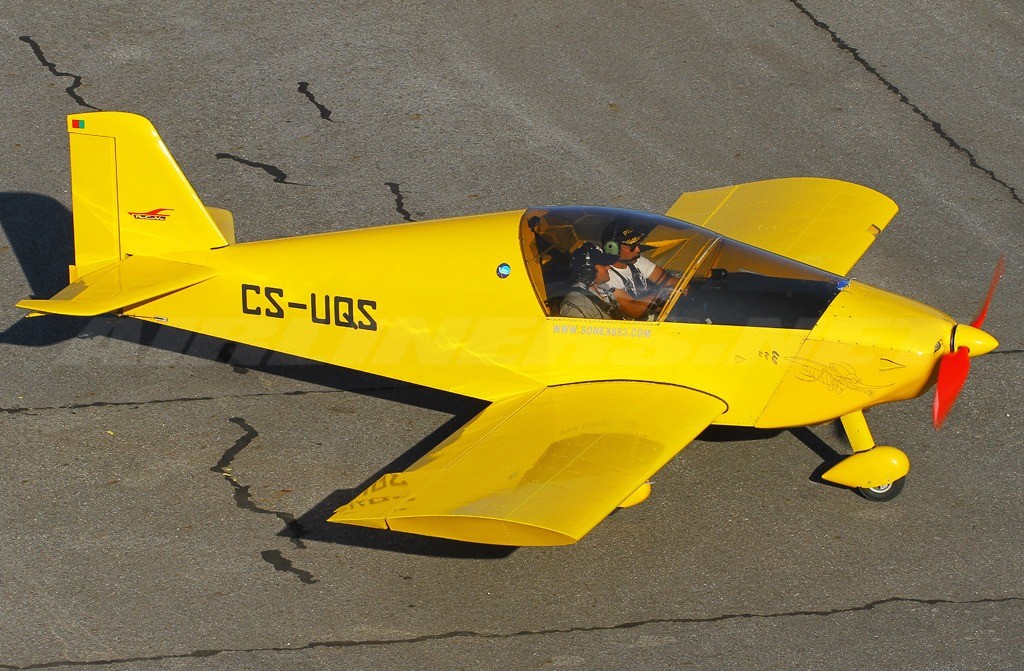
Some aircraft look like they’re moving even when they’re standing still, and the Sonex is one of them. Even just sitting still on the grass at Saltby the aircraft looks good.
In fact, it’s quite a striking machine−possibly because of the design of the canopy which seems to flow from the tip of the small, sharp spinner to the top of the swept-back fin in a single unbroken line. (At the time, the fuselage strongly reminded me of something, but I just couldn’t quite place what it was. Take a look at the picture on page 31: doesn’t it look like one of those fish-shaped plug-type fishing lures?)
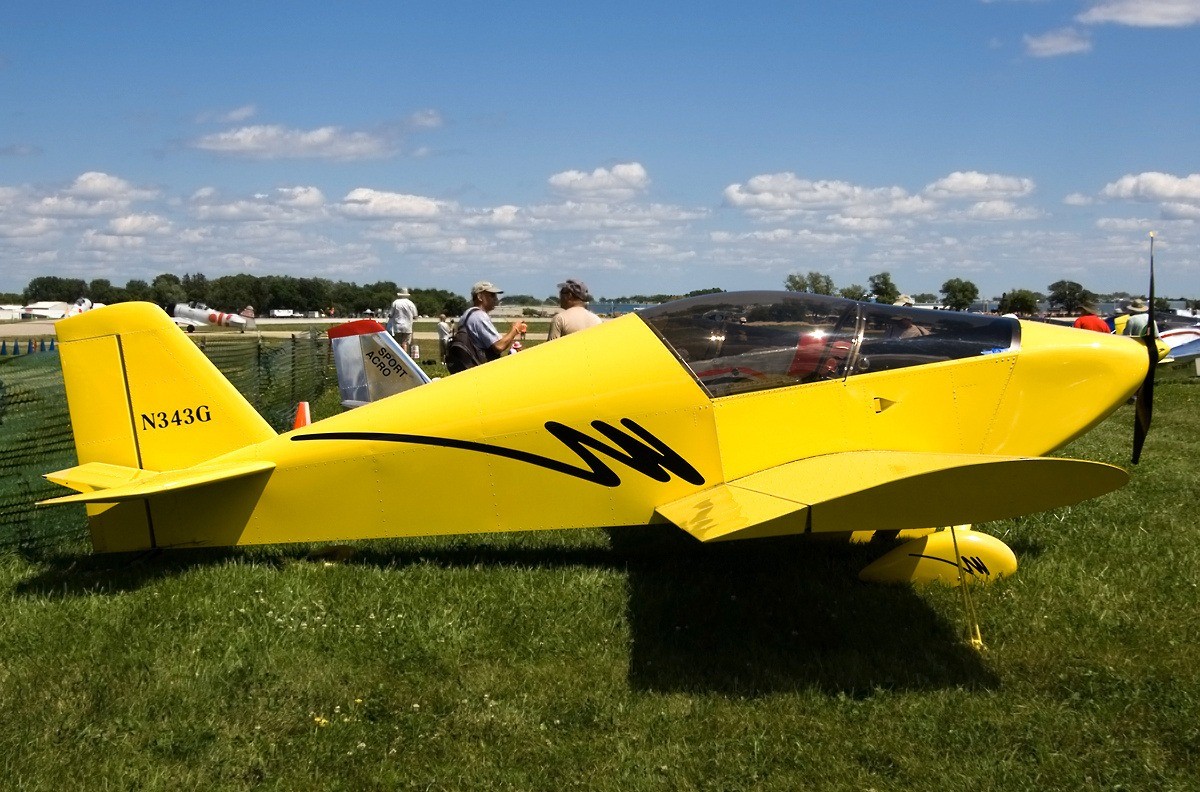
In complete contrast to the profile of the flowing fuselage, when viewed in planform the wings look like they have been produced by an industrial guillotine − there are lots of straight lines!
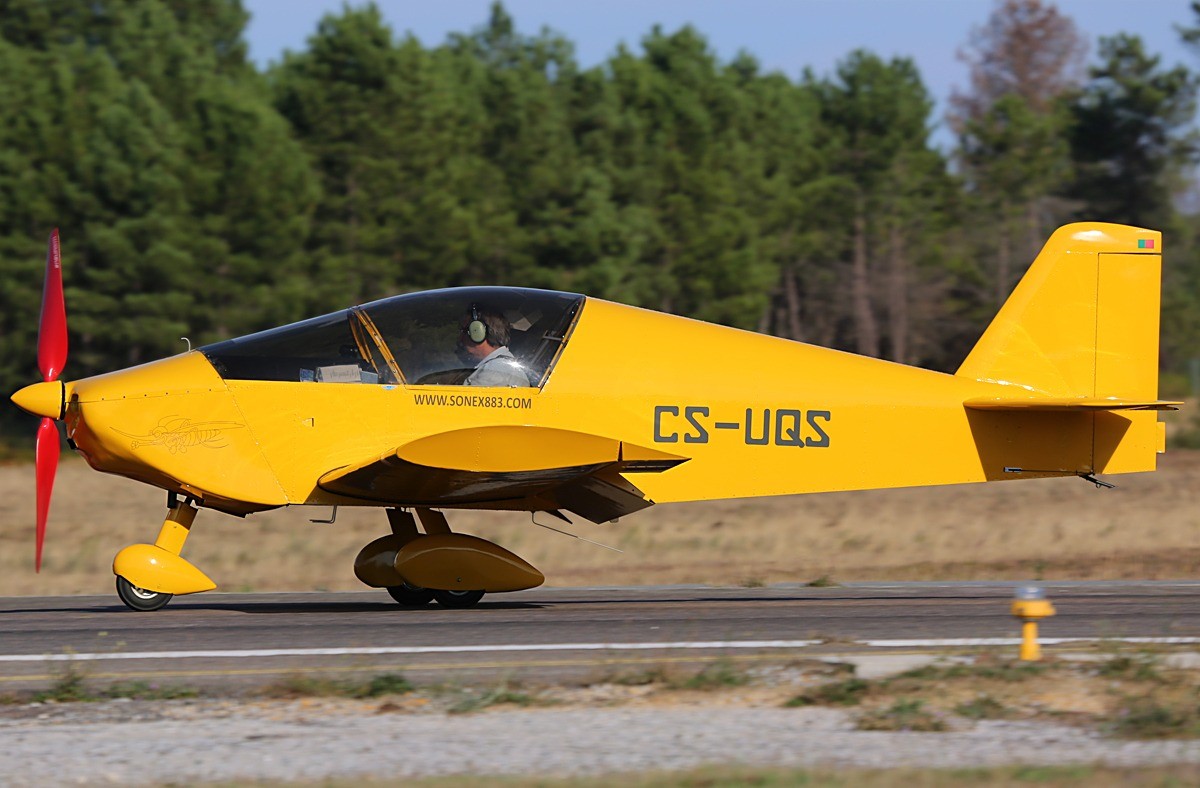
Despite being a popular design in America, the Sonex family of aircraft are relatively rare in the UK, with only about ten flyable, although several more are under construction. In fact, the test aircraft, aptly registered G-SONX and owned by Chris Rayner, is the only one I’ve ever seen in Britain, and I begin the walkround with a heightened sense of anticipation.
Construction is completely conventional: the primary material is 6061-T6 aluminium alloy sheet, although some non-structural parts, such as the cowling, wing tip panels and wheel spats are made from GRP.
Stainless steel blind rivets are predominantly used throughout the classic monococque design, with driven AD rivets used for the main spar. Aluminium skins (primarily 0.025” and 0.032”) cover an internal structure of ribs, spars and bulkheads.
The first surprise is in the engine bay, for unlike most LSAs, which tend to be Rotax-powered, this Sonex is fitted with a closely cowled Jabiru J-3300 air-cooled flat-six, which produces 120hp at 3,300rpm. (Earlier J-3300’s had a ‘max continuous’ limit of 2,750rpm, which produced 107hp, but this restriction was removed for later engines.)
It spins a wooden two-blade fixed pitch Sensenich propeller, and is fed from a single fuselage tank−with a capacity of sixty litres−mounted between the engine and cockpit. Access to the engine bay is adequate but not outstanding; it is held together by six piano wire hinges and six Dzus fasteners.
There is a small hatch on top of the cowling which provides access to the oil dipstick and another for the fuel cap filler. The cantilever constant chord wings use a 64-415 aerofoil and feature about three degrees of dihedral. There is no washout between the root and the tip−being a constant-chord wing, it always stalls root first.
As the Sonex is quite clean aerodynamically I was curious to see how the designers had addressed the problem of providing adequate drag on the approach. Roughly two-thirds of the wing’s trailing edge consists of large mechanically actuated flaps which have three settings: 0, 15° and 30°: I wondered if 30° would be enough (and subsequently learned that as designed there’s a fourth setting of 40°, which the UK approval body, the Light Aircraft Association doesn’t allow).
Both the elevator and the mass-balanced ailerons are actuated by pushrods, with cables for the rudder. The fixed taildragger undercarriage has a reasonably wide wheelbase but a relatively short wheel track. Each main wheel is carried by a single piece of titanium round bar stock and features snug-fitting spats and cable-actuated drum brakes (current models have hydraulic brakes), while the small solid tailwheel is suspended from a titanium rod and steers through the rudder pedals via a single pushrod from the rudder bellcrank.
Aft of the cockpit the fuselage tapers towards the fin, which features a slightly swept back leading edge and carries a relatively narrow-chord, but near full height rudder. The two-piece elevator is carried by the cantilever tailplane, which also features a mildly swept back leading edge.
There’s a large, cable-operated trim tab in the port elevator and a matching, fixed tab in the starboard. In fact, the trim system is worthy of further comment, as a fascinating feature is that on UK-built aircraft lowering flap automatically applies nose-up trim.
Most Sonexes are trimmed using the AeroConversions Trim System fitted to ‘NX, which uses a trim wheel and jackscrew assembly combined with two springs to put tension on the control stick. Basically, turning the panel-mounted trim wheel anti-clockwise adds ‘nose down’ pitch trim by applying spring-loads to the elevator circuit.
To trim ‘nose up’ simply turn the trim wheel clockwise. However, for UK-registered aircraft the LAA also requires the original elevator trim tab on the port elevator to be retained and linked directly to the flap lever, so that as flap is extended the elevator trim tab simultaneously and automatically trims ‘nose up’.
My understanding is that in most countries builders very much like the AeroConversions Trim System (unofficially dubbed ‘Dial-A-Speed’), although it is also permissible to install the original cable-actuated trim tab, which is operated by a simple cockpit lever. Only in the UK are builders required to install both systems…
Preflight complete, it’s time to fly.
Access to the wide, side-by-side cockpit is good. The very large, single-piece canopy hinges to starboard, so ingress is via a walkway on the port wingroot. There’s a large baggage bay behind the seats which can carry eighteen kilos and is accessible in flight.
Neither the seats nor pedals adjust, and for insurance reasons owner Chris must sit on the left. This means I won’t have access to important controls such as the brakes and flaps, and even the elevator trim wheel (a large red rotary knob on the lower-left part of the panel) will be a bit of a stretch.
The brakes and flaps are both operated by tall metal levers mounted on the port cockpit sidewall. The brake lever operates both cable actuated drum brakes simultaneously, while detents for the flap settings are incorporated into the cockpit sidewall. (There is an option to make the brakes and flaps accessible from either seat.)
Cockpit instrumentation is almost entirely electronic, with the centre of the panel dominated by an MGL Avionics Stratomaster Enigma. This highly sophisticated unit is a true EFIS (electronic flight information system), and can display primary flight and engine information as well as navigation data. It’s a great unit, but with so much information presented on a single screen I would also like master warning and master caution lights (these are in fact an option).
The only analogue instruments are a standby ASI and altimeter, with a slip ball under the ASI. The electrics continue the minimalist theme. They consist of a pair of large rocker switches; one for the avionics and the other for the master on the far right of the panel, with a small row of tumbler switches beneath the altimeter and a combined rotary starter magneto switch on the left.
Circuit breakers are all mounted in a subpanel beneath the instrument panel along with the elevator trimmer and plungers for the mixture, carb heat, throttle and fuel shut off.
Closing the canopy confirms that there are no DV panels and this generates my usual complaint that you should really be able to open a small window in flight in the event of the canopy becomimg fogged or contaminated, for example by escaping engine oil.
Despite being neither hot nor cold, and therefore at the very worst temperature for starting many an aero-engine, the Jabiru growls into life on the first try and sounds good, with a crisp eager bark.
When taxying the field of view is typical taildragger, being a bit constrained over the nose and−as mentioned earlier−because the turn radius cannot be tightened by differential braking you do need to think ahead. I also note that the ‘short-coupled’ theme has been carried over into the cockpit, as both the throttle and mixture controls operate over a very short travel.
(I was particularly intrigued by this and contacted Sonex’s General Manager Mark Schaible, who explained that although the design initially used a push-pull throttle cable, it now uses a purpose-designed throttle quadrant.) The titanium bar undercarriage confers a very comfortable ride and the tailwheel steering is nice and positive, although I do miss the extra control authority provided by differential brakes.
At the run-up point I complete the pre-takeoff checks, then note the local atmospheric conditions and our all-up weight. Today, Runway 25 has a slight crosswind from the left (the surface wind is about 8kts from 160°), while the ambient conditions are slightly above ISA, with a surface temperature of 17°C, a barometric pressure of 1013.8 and a field elevation of 440ft. With two POB, half fuel and no baggage we are about forty kilos below the 522kg maximum all-up weight.
Having carefully lined us up with the runway centreline, I open up slowly to full power. The throttle has a very short throw, and as it hits the stop the motor surges momentarily, which could’ve been somewhat disconcerting if Chris hadn’t mentioned during the briefing that it occasionally does this. Basically the Jabiru doesn’t have an accelerator pump, so if you try to increase power too quickly (which is only too easy to do due to the throttle’s limited travel) the engine demands more fuel than the system can initially provide.
Acceleration is adequate but not outstanding, but as I gently raise the tail the engine settles down, the prop begins to bite and as the airspeed rises past sixty knots I gently ease the stick back and the Sonex is off the ground and climbing away, having used around 150m of runway. The initial rate of climb is over 1,200fpm at 70kt.
As soon as we are well clear of Saltby I begin to assess the general handling characteristics, and even a cursory examination of the primary controls reveals that their harmony is not ideal. The ailerons are light and powerful but the elevator seems lighter. As the walkround had suggested, it is quite sensitive in pitch, being close-coupled.
A more vigorous exploration of the flight envelope soon shows it has a commendably rapid roll-rate for a Light Sport Aircraft, and although only small amounts of rudder are necessary to keep the slip-ball centred in shallow- to medium-banked turns, if you really reef it around some firm rudder input is required. All the primary controls are powerful, with low breakout forces and very little ‘stiction’ but the elevator could possibly benefit from being slightly heavier.
The emphasis is quite clearly more on ‘control’ than ‘stability’, and if you’re used to the rather stodgy handling of most Pipers and Cessnas you’ll have to raise your game a bit. Me? I rather liked it! An analogy that both Chris and Mark used independently of each other is that it really is a ‘flying sports car’−and that describes the overall feel of the machine nicely.
Indeed, I would’ve loved to sample a few loops and rolls, but it is not approved for aerobatics in the UK. American pilots can aerobat their Sonexs at between +6 to -3g and can perform aileron and barrel rolls, spins, chandelles, loops and several other manoeuvres, as long as the weight doesn’t exceed 430kg. When operated in the ‘Utility’ category the MAUW is a very useable 522kg, but the g limits drop to +4.4/-2.2. However, as it really is quite ‘clean’ aerodynamically I think care would need to be taken on the down line, as the Sonex does accelerate rather rapidly if the nose is significantly below the horizon.
A look at the stick-free stability reveals that−as I’d suspected−longitudinally, it is somewhat ‘relaxed’. Having trimmed for 100kt I ease back on the stick until the speed drops to ninety and then release it. In most two-seat LSAs you typically get two or three long wavelength, low amplitude phugoids as the aircraft returns to the trimmed speed, but the Sonex seems somewhat divergent in pitch, even though I would’ve guessed the C of G was slightly forward during the test flight.
The lateral stability also seems somewhat relaxed (it’s just barely neutral) while directionally it is strongly positive, courtesy of the slab-sided fuselage and large fin.
Occasionally I can feel a very subtle low-frequency vibration through the airframe, which turns out to be one of the wheels (which is slightly out-of-balance) rotating in the airflow.
Slowing down to explore the slow side of the speed envelope reveals a feature I very much approve of−Vfe, flap limiting speed, is relatively high at 88kt. Far too many modern sport aircraft have Vfes that are impractically low. Stalls and slow flight are very benign, and although I thought the pre-stall buffet to be quite subtle the actual stall is very gentle and recovery is very easy, with minimal loss of altitude.
With any amount of flap deployed it tends to drop a wing at the stall, although this could be due to the flap being slightly mis-rigged, or even my (not inconsiderable) weight!
With full flap and just a hint of power I get the speed down to an impressively slow 38-40 knots.
With the flaps up it tends to break straight ahead, with no tendency to roll off. Interestingly, with power at idle and flaps up the glide angle is flatter than I was expecting, bearing in mind the rather stubby, constant-chord wing.
Accelerating out of the final stall, I set full power, trim forward and let the Sonex have its head. The airspeed increases rapidly, and I soon have to ease the throttle back to keep the engine rpm within a sensible limit of 2,750. At this power setting and 3,000ft the Sonex will true out at an impressive 125 knots for a fuel flow of around 21-23 lph.
However, if you plan on cruising this fast it’d better be smooth, because Va and Vno (design manoeuvring speed and structural speed) are the same at 109kt IAS. In fact, the relatively light weight (even when operating at the Utility max weight) and low wing loading mean that cruising at the sort of speeds the Sonex can achieve requires a pilot to be quite circumspect if there’s any possibility of turbulence.
(I didn’t get a chance to check it, but the POH claims a TAS of 147kt at 8,000ft−which is pretty impressive, bearing in mind it stalls at less than forty.) As it has a sensibly sized fuel tank, maximum range is around 350 nautical miles, with thirty minutes reserve. One thing I did notice is that at high speed it is quite noisy, although the headsets Chris had brought weren’t noise-cancelling and as I wasn’t wearing my trusty Bose X this could have been a factor.
Continues to impress
Back at Saltby the Sonex continues to impress. As it’s quite a slippery little beast it’s important to get the flaps down and the trim set in good time. I guess the ‘auto-trim’ works OK as I wasn’t aware of it, but I couldn’t help but wonder if it is really necessary.
Although we’d taken off from Saltby’s 800m tarmac runway I elect to land on the shorter, bumpier grass strip as I am interested in seeing how well damped the titanium rod undercarriage is. Quite a few kitplanes use the steel taper-rod type of main undercarriage that was developed by the famous US air racer Steve Wittman.
While this system is undoubtedly cheap, simple, reliable and rugged, it does possess one singularly poor characteristic: its damping qualities are practically non-existent. Basically, it doesn’t so much absorb energy as just redirect it! Consequently, if there is the slightest bounce or even a rough surface, the ride is not pleasant. Furthermore, as the legs flex, the geometry of the undercarriage is constantly changing, and this can influence the aircraft’s ground handling.
While this is probably not an issue when operating from a hard, smooth runway, it most certainly can be when operating from anything other than a perfect surface.
On short final about 65kt feels right, and I start bleeding the speed back towards sixty ‘over the fence’. However, as I close the throttle and flare, the Sonex floats further than I intended. I don’t really fancy coming in much slower, and can’t help but think that if the flaps had been set to 40° (as the manufacturer intended) it would’ve sat down a bit more promptly. As the aircraft settles and the tail comes down the forward field of view shrinks rapidly.
Touchdown is smooth and the aircraft rolls out straight and true on the grass runway. While I’m not convinced that the shock absorption and damping of the titanium rod undercarriage is quite as good as a well-maintained oleo-based arrangement, it’s clearly superior to the steel taper rod type.
There’s plenty of runway left so I open the throttle slowly, but the engine still surges momentarily. A second circuit and landing is equally straightforward, although in the interests of honesty I suspect that landing on concrete in a crosswind is probably considerably more ‘sporty’ − an observation that could be made of every taildragger.
However, this is when you would really miss not having differential braking available. And if any of you are wondering about my earlier comments about the somewhat relaxed longitudinal and lateral stability, allow me to clarify: whenever I evaluate an aircraft, two very important areas to examine are, of course, stability and control or, as I prefer, control and stability.
Note that although I found the stick-free stability to be somewhat lacking in both pitch and roll, control around all three axes is perfectly acceptable, once you’ve adjusted to the somewhat sensitive elevator. It’s not difficult, or even that different, just distinctive – and possibly even adds to the charm of flying the Sonex.
Essentially, it’s a ‘pilot’s aeroplane’, not a car − or even a sports car − with wings. It’s a sports aircraft, and the general handling characteristics reflect that.
Half the price of an RV
I found the Sonex very agreeable to fly. The controls are crisp, the engine responsive and the visibility provided by the large bubble canopy good. It’s also a very efficient little machine, with fine handling, a reasonable range and a commendably broad speed envelope.
Chris described his as being “good value, good performance and good fun!” He also emphasised the “refreshing sportiness of the handling without compromising its easy controllability – they’re a bit like a half-price Van’s RV.” And that’s a more eloquent summing-up than I can manage!
The improved B Model is now available, with an enlarged cockpit for bigger and taller pilots, a central ‘Y-stick’, electric flaps and dual throttles as standard − Ed.